F![]() or decades, we have been making all sorts of picture frames and many
or decades, we have been making all sorts of picture frames and many 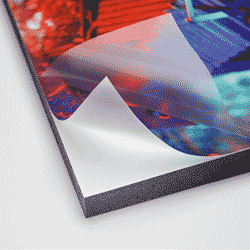 types of picture framing. And with that, we also did all methods of mounting. Broadly speaking this mounting process can be categorized as wet-mounting or dry-mounting, and in the latter category, self-adhesive foamboards, feature prominently. It's easy to know why. Properly used, these can offer clean, quick and easy permanent mounting in a matter of seconds. Mounting is more fully detailed and explained in our previous post " Picture framing wizardry and the secrets of mounting" but, basically, it means the bonding or glueing of artwork onto a flat surface so that the art stays and remains flat, not bend, ripple or buckle, nor move around or fall off.
Sticky, or self-stick boards, or self-adhesive board foamboard are common, popular and in widespread use for many hobbyists, illustrators, graphic designers, sign-writers, home enthusiast , photographers, an even picture framers.
These are good products, when used carefully. Occasionally we use them ourselves, when for instance, when mounting small photographs for football-jumper photograph collages.
After we mount the photo or photos, we bevel-cut all the four sides of the foamboard, giving the mounted photo a sleek, smart, chic appearance. We do this trimming with a bench mat cutter rather than a hand-held knife as the machine, with a new, sharp blade, ensures, continuous, smooth angle, or bevelled cuts.
The boards are also popular in the graphic arts industries as artists and designers can mount prints, posters and other art directly onto flat surfaces themselves, without needing to pay a picture framer for picture framing mounting services.
Self-Adhesive Foamboard Mounting Pitfalls
However, successful mounting takes skill, patience and practice. Many have little of either and this can lead to bad mounting or mounting failures.
Either of these are eyesores that occur when someone inexpertly or incorrectly mounts art on paper, perhaps a poster or print, unsuccessfully onto a sticky, self-stick, or self-adhesive board or backing of some kind.
These eyesores are one, or more often several, wrinkles, creases and bubbles on what should be an otherwise, thoroughly smooth, flat, level and even surface all over. A good example of this is shown below, self-evidently, the bad mounting with the wrinkles eyesore, is the left pane of the image.
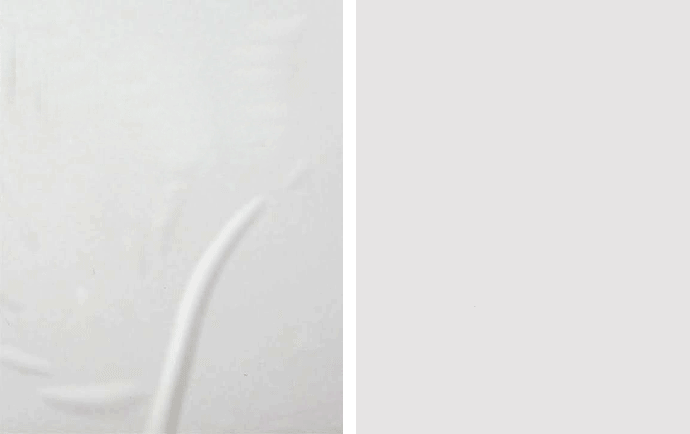
The wrinkles occurred because of the partial, incomplete mounting, during which the air was not fully squeezed or pressed out and became trapped under the art being mounted.
Thus the combination of self-adhesive, self stick or peel-and-stick foamboards combined with inexpert process and application is the major cause of these problems.
In a professional setting or environment, bad mounting is unlikely to happen because the mounting process is usually applied and performed by and experience operator using known, quality boards. The problem, as we see it, is that foamboards are too often marketed as easy and fast mounting solutions with no experience necessary.
However experience IS necessary because the adhesive coat of the foamboard tends to grip any item being mounted instantaneously.
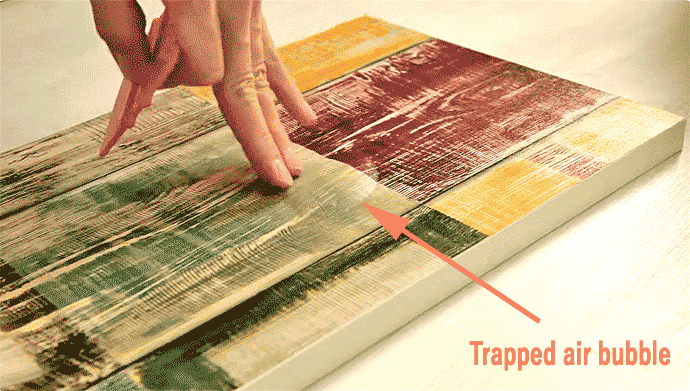
Most people don't know how, or have not had the prior mounting experience necessary to position and lay the art for mounting correctly. It is crucial to do so lest air be trapped under the art and form bubbles. One is shown below on a thick, self-adhesive panel:
Remedying Air Bubbles
Should an air bubble become trapped in self-adhesive foam board, there are two remedial methods worth trying. One is to pinprick the bubble with a small, sharp needle, expelling, or squeezing out, the release the trapped air with fingers and then pressing down the bubble to make it stick flat to the adhesive.
The other is to use a portable or hand hairdryer to expand the air and thus crack the bubble, or press it in a vacuum press to press out the unwanted air. Some folks have even tried injecting PVA adhesive or silicone into the to help it re-stick to foam board, but injecting glues into bubble has never worked for us, we tried.
Mounting Technique with Self-Adhesive Foamboard
Users of foamboard have different styles of mounting down their prints or poster onto self-adhesive foamboard.
We cannot comment on their methods but we can explain ours. We first cut the foamboard for the art to be mounted about 10% bigger than what the art actually is.Thus if the art 50x40 cm we will cut the foamboard about 55x44 cm.
The reason for this is that if we are a little bit off-centre in laying down the print, we will not be able to move it or re-position it. But we can always trim off the out-of-square sides to make it square or square it up.
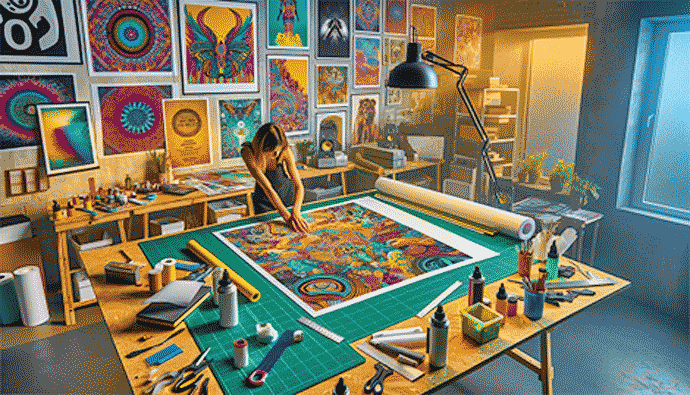
We then remove the peel-away liner and have two persons lay down the art as shown below. One lifts the art, the other gently tacks the bottom at onf the sides . As we do so the worker at the lowe rned begins to slowly smooth out the air, radially, from the centre outwards so as to prevent the forming of air bubbles.
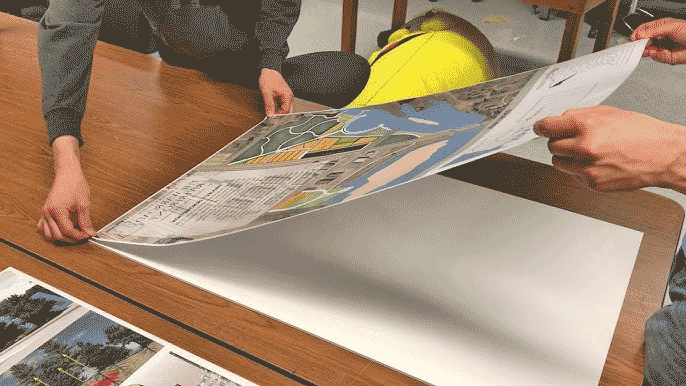
Perhaps the best way to avoid air bubbles and creases is to prevent them by way of prevention with practice. As we explained above here and detailed below, in the list of Do's an Don'ts, we suggest starting off with small mounting jobs, to work in pairs and practising. Practise laying down the art on to the adhesive slowly and evenly, slowly pressing and pushing any air out from the centre outwards, ensuring that all air is expelled to minimize entrapment.
What To Do and Not To do with Self-Adhesive Foamboard
| List of Do's | List of Don'ts | ||
| ✓ | Do practice mounting on small pieces at first | ❌ | Don't buy unknown, untested or obsolete brands of foamboards. |
| ✓ | Do begin mounting using two persons, as shown above | ❌ | Don't keep the foamboards near water or apply moisture |
| ✓ | Do lay down the art as shown in the photos above | ❌ | Don't keep, store or stack any foamboards in direct sunlight |
| ✓ | Do smooth any trapped air starting from the centre then going outwards, toward the edges | ❌ | Don't mount originals on foamboards are the process is permanent and irreversible |


