![]() The idea for a blog on picture framing mounting came from a very pleasantly
The idea for a blog on picture framing mounting came from a very pleasantly  surprised Customer some time ago. The gentleman in question had brought in a very rumpled, markedly creased, badly folded, extensively dog-eared and rather aged, large movie poster for framing. All the Customer required was for the poster to be put in a frame and look straight and flat. He didn’t want conservation, didn’t care for preservation or how we did it and, and, oh, yes, he was on a tight budget a couldn’t spend “too much on it”. So we suggested clear glass and a frame with a price ... that suited him. We he came to collect his framed print a couple of weeks later he was simply astonished at how neat, clean, presentable, level, flat and even the poster looked under glass.
It looked like it was brand new he remarked, adding that he thought we were picture framing wizards and asked us to show him how we did it. And since this wasn’t the first time that we were asked to show and explain what picture framing mounting is, we thought we’d write up this post. To begin with, mounting in picture framing has nothing to do with anybody mounting or riding anything.
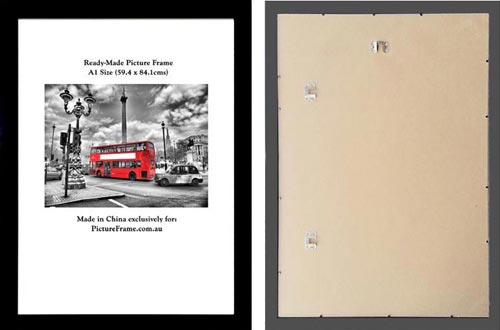
Picture framing mounting is just our trade term describing the process of attaching a print or a poster to a supporting surface, usually called a backing. A first query to this might be, what’s a backing and why is it needed? The photo below shows, at its right hand pane, the rear of an A1 poster frame with its backing, that is, the brown MDF sheet with the hanging hardware staked on.
So now that we know what a backing is, we should also expand on what it does and how it works. The backing is essential because, without it, any photo, print or poster put into the frame, would fall out because the art needs something to back it, or support it, hence, its’ called a backing.
The photograph of the red bus above is the print, poster or art work that is inside the frame. It is sandwiched between the glass at the font and the backing. While the image above show the photo sitting nice, flat and even under the glass, in practice this often does not happen.
Thus, when taken to a picture framer, prints are frequently rolled up, often warped or twisted, with an unsightly, cockled or rippling appearance as in the example below:
When a picture framer is presented artwork such as the one above, he or she knows that the art may not sit flat or centered under the glass even when framed. The framer will know by experience and training that ( unless the work to be framed is special, rare, valued or valuable ) the art will need flattening, else Customers may reject the finished framing as unsightly or unacceptable.
This mechanical flattening is, in the main, generally achieved by the following picture framing mounting methods a) vacuum press wet-mounting b) vacuum press cold mounting and c) vacuum press hot mounting. For the sake of practicality, only the first method, vacuum press wet-mounting will be discussed here.
Additional information on other mounting methods may also be found at Mounting Artwork for Picture Frames and in Picture Framing . This page further explains why it matters how and why art ought to be mounted for framing.
A word of caution first. If wanting to make artwork permanently sit centered and remain flat under the glass by the use of matting, or hinging it to a window mat, this method will not work well. This is because a matted photo, paper, or document is still free to expand and contract according to the ambient temperature and humidity range of variations.
It is this movement which causes the cockling, or rippling, of the paper under the glass. Incidentally, matting can add as much as 75% to the cost of framing and most commercial print and poster framing is framed unmatted.
However, let's return to wet mounting, also called "sticking down" by framers, which, whether wet, hot or cold, is pretty much the only method readily available for picture framers to securely and permanently mount art to a backing board so that it will stay dead flat forever and a days, so to speak.
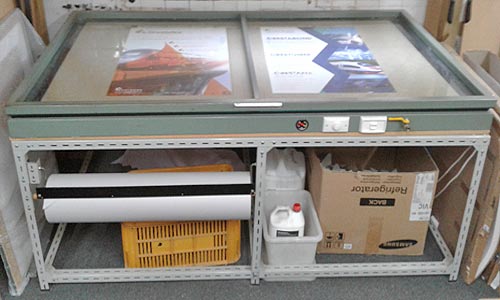
Now that we know what mounting is and why it is needed, let us move forward and explain how it is done. As adduced to beforehand, there are thee main mounting methods but we will only explain the one which is most commonly used by picture framers, the wet-mounting method with a vacuum press machine. One of these machines is shown below:
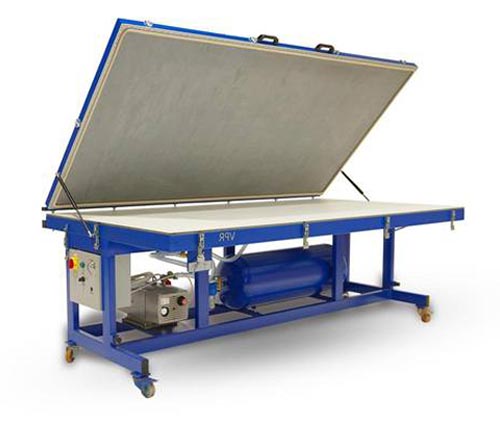 The presses are often purchased by picture framers and are sold in a variety of sizes from many local and overseas manufacturers. The vacuum press technology is relatively straight forward to understand. Its vacuum principle is that same as when someone sucks the air out a bag. As the air is sucked out, the bag will flatten.
This happens because a vacuum is created and atmospheric pressure presses inwards all around the surface of the bag, squeezing it flat. And so it is with a vacuum press.
The machine's principal components generally comprises of a table, a lid and an electric motor. Artwork is placed on inside the press, the lid ( often made from thick, solid glass ) is closed and a motor switched on which sucks the air out of the now closed press.
Atmospheric pressure does the rest, flattening whatever is inside the press ( in our case a print or poster being glued down ) completely and evenly flat. Let's summarize this process in sequential and pictorial stages:
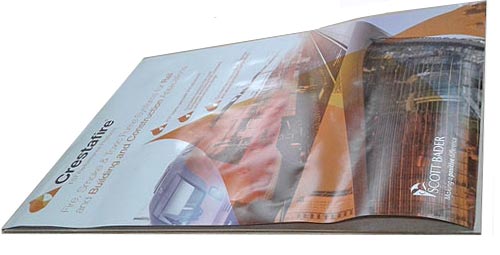
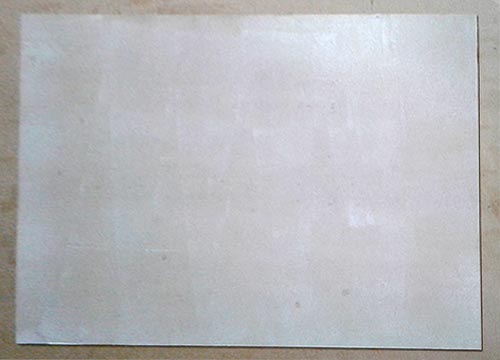
1 . We have a piece of paper colour poster, shown below, which is crumpling, buckling , rippling, visibly, evidently not flat, and needing even, uniform and permanent flattening:
2 . After measuring the above work to be mounted, we cut a correctly sized, section of backing, commonly 3mm thick M.D.F. This is then placed flat on a workbench and manually coated using a paint roller, with a woodworking ( or similar ) P.V.A. glue. As shown below, it is easily and quickly applied with a common hand roller:
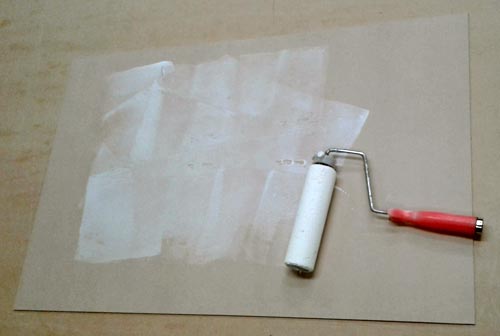
The glue is rolled evenly and all across the surface, much like painting a wall. The entire surface of the backing must be rolled, as shown below. If this is not done thoroughly, the print will not adhere to the uncoated spot or section and the paper is quite likely to lift and bubble up afterwards:
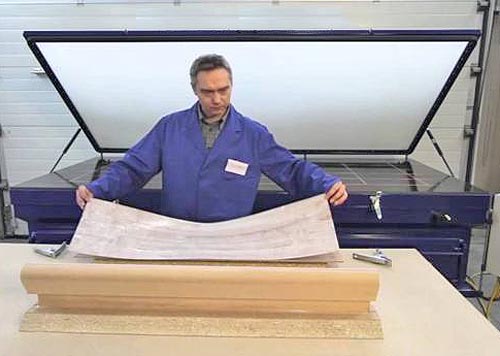
3 . After coating the backing as described above, the print or poster is gently, slowly and carefully laid to rest on top of the wet backing, as shown below. It should not be smoothed flat by hand for too long, if at all. This is because the thin layer of PVA glue can dry quite quickly.
If the glue dries in some parts before the paper is pressed, then the paper will not stick down properly or entirely, full adhesion will not be achieved and sporadic or uneven bubbling may result. It cannot be overemphasized how crucial and important this step is. If wet-mounting fails, this usually ruins the print because this step is not reversible and cannot be undone, or even easily remedied, in our experience.
4. The wet print on its backing is placed inside the vacuum press, the lid is brought down and closed to form a seal, as shown below. After this, the press' vacuum motor is activated via its automatic time switch. The motor quickly extracts the air from inside the press in 10-20 seconds or so.
Atmospheric pressure will then naturally press down on the lid for as long as the motor remains switched on and the vacuum air seal maintained. This presses the print flat onto the wet, glued backing. Once a minute or so has has passed, the motor is switched off, the air seal breaks, air re-enters the press.
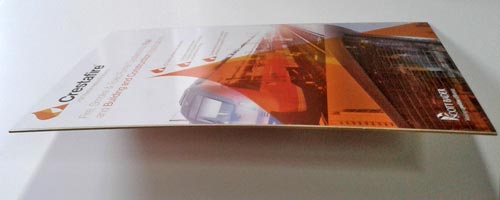
5. A little after stopping the motor, the lid can be lifted. It should reveal a perfectly flat poster, with even and uniform adhesion to its backing board. In our opinion, wet-mounting by vacuum pressing produces easy, cheap, uniform, fast, reliable and clean mounting. This is why it so popular with picture framers.
As mentioned earlier, wet-mounting is of of the few bonding methods which is permanent and irreversible. While it is suitable for inexpensive, everyday, commercial or disposable art it should not be used for other art which has any degree of sentimental, historical, personal or commercial value.
We certainly wouldn't suggest it or recommend it for any original art, drawings, etchings, limited edition prints or any type of signed , numbered or remarqued works. The same proviso applies for any personal photos, documents or anything which a reasonably person might infer of significance, importance, or value.
In the rare instance of a Customer insisting that such a work be permanently an irreversibly mounted, we would suggest that an Indemnity Statement or Liability Release be executed. It ought to be signed by the Customer releasing the picture framer from any faulty workmanship claim or general negligence.
Perhaps a last observation we will make is one which, we feel, is somewhat of a generalization, though an accurate one. After half a century or so of picture framing we have observed and witnessed bout our industry and its Customers changing, profoundly and remarkably so. For better of worse, the internet has changed our industry.
Far too many mum-and-dad shopping strip picture framers have shut up shop, scores of art galleries have have also shut down and Australia has pretty much stopped making picture frames because it's cheaper to buy them online.
While price-conscious Customers have always been around, the epidemic of the cheapest-online-price malaise has meant that much modern art is hurriedly and cheaply framed looking suboptimal or substandard. Just ask anyone who has bought an A1 poster frame or a B1 poster frame, how do their posters look in the frames?
Chances are that they will reply: "Okay, but the print is a bit wavy, it's not flat and it ripples". And this reply often begs the question, how can it be fixed? Some might be tempted to say, " Why, by the picture framing mounting method described in here, of course ! ".
Alas, picture framers generally can't vacuum press ready-made-frames because these invariably have their backings fitted with steel hangers or other metal fittings staked on. We won't do it either because if we were to try and vacuum press one of these backings, we would risk damaging or puncturing the machine's soft rubber bladder which holds and releases air.
This component is quite delicate and expensive and this is why no nails, screws, hangers or other metal fittings are ever permitted to be placed inside vacuum presses.
This is why, in the main, vacuum-press wet-mounting is a mounting method reserved for custom picture frames and custom picture framing, but not off-the-shelf, pre-made, or ready-made frames.



Ok, so it looks as though this mounting down or glueing down process is not something do-it-yourself people can do as they don’t have a vacuum press, and I get that. But what about spraying the back of the frame with an adhesive spray can, laying the poster down and then smoothing it down by hand until dry, would that not work?
This might possibly work for a small print, say up to 11″x14″ or so in size, but you’d be courting trouble with anything larger than that. The reason is that many adhesive sprays tend to dry and set too quickly. These can and do evaporate and grip much earlier than water-based P.V.A. If the spray does that while you’re still smoothing and pressing the print down, then the paper won’t slide or flatten out any more and it will grip the backing board. This premature gripping can easily cause unsightly creases and ruin the finished appearance of the print. The other problem is that sprays can blow, spatter, stutter and blurt solid particles onto the backing board while spraying. To neatly and quickly remove quickly this by hand is messy and difficult. On the other hand, is these particles aren’t removed, these will show up a lumps or “pimples” when pressing the artwork dry. Lastly, spray adhesives aren’t renown for their stability or durability and these often fail after a few months, or years. For any and all of those reasons we just don’t use spray adhesives.
You can turn the heat on to 90 degrees Celsius and it should re-activate the dried PVA glue. I haven’t actually done it myself but I believe you can apply a couple of coats of slightly diluted PVA on to backing board, or mountboard, allow it to dry and then use this in the heated vacuum press, which ought to re-activate the glue and re-adhere the prints or paper artwork.