No, you don't only have put a canvas painting in a frame, you have other choices. The first choice, and most  popular one is to stretch it over a strainer or stretcher frame. That means first making the frame and stretching your canvas over it tightly. That way you won't even see the frame as it'll be hidden inside the stretched canvas. The second choice is to mount or glue down your canvas art (only if it's an inexpensive or of no real value item) onto a board, just as you would a print or poster, and then put a picture frame around it. With this choice, most Customers choose not to have glass fitted to picture frames this tends to take away the feel and texture of oil paintings on canvas. The third choice is to combine the firstand second choices together so as to have the canvas strainer-framed and picture framed though this still means to put a canvas painting in a frame.
This last option isn't as popular because it's normally twice the price and it's usually reserved for the finer canvases or for artwork of value to.
For those customers who don't want to pay a picture framer to make a stretcher framer and stretch a canvas over it, they can try to do it themselves.
First, Source A Strainer Or A Stretcher Frame
As a first step, instead of making your own strainer, or stretcher frame, you can buy one which is already made-up, or pre-made.
The difference between the two frames is that the former is cheaper as it won't have any of the 8 key slots and 4 stretcher keys. The latter, instead, will have these so as to permit re-tightening of the canvas should this lose tautness over time.
There are several online sellers sell these strainer and stretcher pre-made frames cheaply enough. Most of these frames are fully imported and perhaps a quarter to half the price of what a local picture framer would or might charge. Most are also of supplied in several, Imperial and Metric standard sizes.
Chances are that you'll be able to source a pre-made stretcher frame for your 16"x20" or 20"x30" canvas easily and cheaply enough from an online supplier.
Stretching Over A Strainer or Stretcher Frame
So once you have a suitable stretcher framer for your canvas, all you have to do is stretch over or on it. While this isn't very easy to do it isn't very hard to do either. Stretching a 20x30" canvas yourself can save you anything from $200 to $300, depending on where you go and who the picture frame is.
Begin by rolling out or unrolling your canvas flat on a clean work table and putting your pre-made stretcher frame on top of it. Ascertain that the four, unpainted, blank, or raw edges of the canvas are wide enough to be wrapped around and over the thickness of the stretcher frame.
A good width is 5 cm, or at least 4 cm. Anything narrower than that will make it the difficult to achieve a good grip with the canvas pliers. A good, strong, firm and repeatable grip is necessary to pull the canvas and tension it sufficiently and evenly. Insufficient tension is the main reason of canvases sporting that unwanted floppy and wavy look.
If the width is excessive, trim the edges, but be careful, once you've cut the canvas you can't put it back. You're now ready to start stapling the canvas to the stretcher frame. Begin to do so with by stapling one staple at the centre of any one side.
Repeat the operation with the other 3 sides, this time pulling the canvas tight across the stretcher frame, thus tightening it, bit by bit. You should now have one staple at the centre of each section.
The canvas will look all puckered an funny now, but don't worry, you'll gradually be stretching it tighter and flatter. Now continue stapling a few staples at the time, not more than 2 or 3, each about 25mm apart from the other, from the centre outwards, consecutively on each of the four sides.
Whatever you do, don't be tempted to staple any one side all the way. You won't achiever proper tension that way! Remember that most important technique when stretching your canvas to the stretcher is to staple it starting from the middle, or the centre, and slowly progressing, one staple at a time, outwards.
Stapling The Canvas Over A Strainer or Stretcher Frame
If you attach, or fire, more staples than what it's really needed, don't worry, these won't harm your canvas. Of course, as you proceed to staple all four sides, make sure that you pull the canvas' edges tightly, as much you can, with your free hand.
Without this continuous pulling, the canvas won't have the proper tension and it won't look flat when you turn it over. When you've stapled the four sides all the way, fold the fabric at the four corners of the canvas neatly and staple each corner to keep the corner tucked in.
If your now stretched canvas isn't quite flat, and if the pre-made frame for canvas was a stretcher frame with keys, tap these them in, each a little bit at a time. The keys will expand the frame, and the four sides, or bars, should push the stretcher frame outwards more, thereby increasing tension and making the canvas surface flatter still. Just don't tap too hard or too much, you might split the canvas fabric.
If after all this the tension still isn't sufficient, the canvas surface still puckers or isn't flat, take off all the staples and start all over again. Thank you for reading this post "Do I have to put my canvas photo or painting in a frame and what choices do I have?".
What To Do and Not To do with Canvases
| List of Do's | List of Don'ts | ||
| ✓ | Do opt to glue down a painting if it's a cheap holiday souvenir on which you don' t want to spend to much money on. It'll be fine glued own on aboard with a normal frame around it. | ❌ | Don't readily stretch an acrylic canvas without testing it first. Test it by taking a margin with paint on it, folding it in two and then squeezing it. If the paint does not crack, it'll be safe to pull stretch and staple. |
| ✓ | Do ask for spacers if wanting your painting to be glazed. The spacers or spacing materials are needed to keep the glaze material away from the paint. If this is not done the paint may adhere to the glaze, thereby damaging it. | ❌ | Don't get your painting glazed unless there's a specific reason for it. Most paintings are generally left unglazed. This is not just because of the added cost. Fresh paint emits fumes which can stain the glass unless completely cured. However this can take a as long as 2 years.. |
| ✓ | Do make sure that a painting has at least 4 to 5 cm raw margins sufficient for gripping, pulling, stretching and stapling the canvas. Smaller margins may cause poor gripping and uneven tension. | ❌ | |
| ✓ | Do ensure that a painting has fully cured or dried before handling it, framing it or stretching it. Undertaking any of those processes with an uncured, still wet painting is asking for troubles. | ❌ |


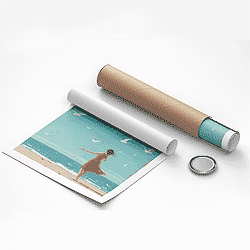
Here’s what happened to my oil paintings. The first time I brought some back from Thailand I left stored inside the tube for more than 4 years cause I left them at my mum’s place. When I took them to a picture framer to get them framed, on unrolling the paintings on the counters, both painting started to crack. The framer said that I’d left them in the tube too long, that they’d dried hard rolled up inside the tube and that he couldn’t stretch them. He said next time I brought some back, I should get them framed ASAP. Anyway last year I went to Bali and brought 4 back ( mum wanted some, they were so cheap!) . I took them right away to the framer as soon as I got back. They didn’t crack and got them stretched fine. So here’s the lesson- don’t leave you oil painting too long inside a tube, get them in a picture frame as soon as you can.
Just an FYI if you haven’t read the whole wall of text in this article. All good art shops sell pre made stretcher frames so that you can do it yourself. They also sell the staple guns, staples, stretcher pliers and anything else you made need. With a little bit of research from this great website and others i was able to stretch my canvas by myself and if i can do it anyone can! Make sure to get yourself a braced stretcher frame for anything over a meter. The frame can buckle during stretching or afterwards during handling so braces are important. My local art store was actually able to put a brace on mine for a cheap fee. The article does a great job at explaining what to do next but some extra tips are as follows… Make sure to hide the staples with some tape when you are done stretching, it will make the canvas look so much neater at the back and remember to burnish hard and apply heat with your fingers so the tape so it doesn’t peel off in 6 months or in summer. Also remember to hang it well. I only stapled some shoelaces to the back of mine and it fell off the wall months later! luckily it was quite sturdy and the canvas was quite thick so nothing really happened. Use screws and specialty framing hangers!