![]() We were reminded of the importance of correct taping when a regular Customer brought in a valuable, antique, watercolour which had slipped and fallen out of its window mat.
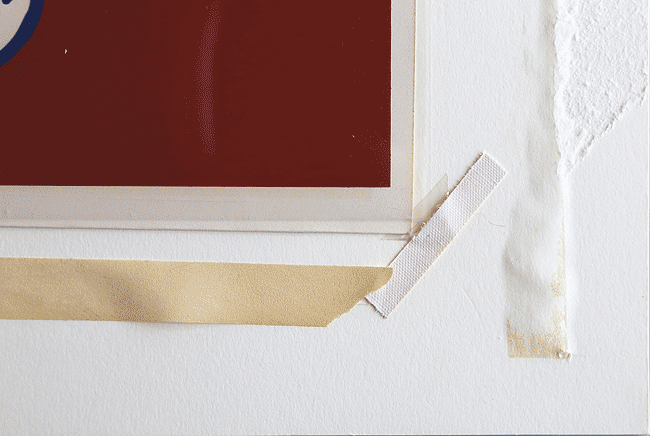
We were reminded of the importance of correct taping when a regular Customer brought in a valuable, antique, watercolour which had slipped and fallen out of its window mat. 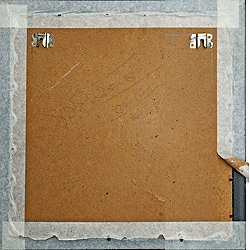 While at first sight that did not seem to be a great issue, we suspected ulterior problems. This is because, in our experience, expert, quality professional taping or hinging rarely fail. When this does happen, it's almost invariably due to the use of incorrect or inappropriate hinging or taping materials, methods, or both. This problem is exemplified by the image below. It shows art taped to a backing with at least four disparate self-adhesive tapes. One is a photograph corner, one a linen tape, one a tan masking tape and the last one, a double-sided tape application. All of them lack any archival or at least, acid acid-free, appearance, semblance, or resemblance.
Picture Framing Failures Caused by Cheap Tape and Materials
We strongly believe that the taping work below was not performed by a qualified, professional, or even an experienced picture framer as it is simply too amateurish.
The main actors causing these problems are well-meaning, but unqualified art owners acting as factotum conservators. The reasons why most people do so an make ad-hoc repairs or emergency work vary.
However and generally speaking, it's because they are too busy, there's not enough time to fix something before an exhibition, or the most common of all, it's too expensive to get a professional to do it so people do it themselves and use whatever tape and materials are at hand to do what needs to be done.
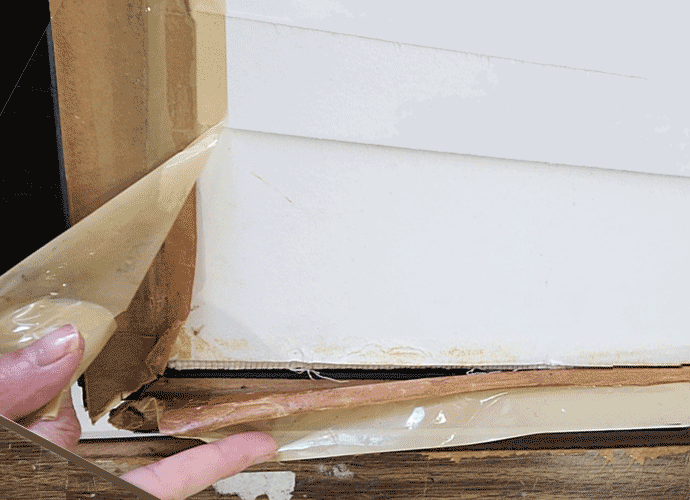
Much art is paper borne and when those pieces of paper need mending, hinging, holding in one piece, keeping it together or just sticking it down, the nearest sticky tape often will do the job. Problem is, tapes ain't tapes. The image below is actually fairly common picture framing misadventure occurrence.
A depressing litany of errors could be recited. The acidic backing, then un-laced embroidery, the contamination withe the acidic wood of the mouldings and the falling apart of the cheap, thin, nasty packaging tape which some bright spark originally though of using to seal the back of the frame from silverfish and other pestiferous intrusions.
 Better Frames with Superior Products and Good Workmanship
Picture framers wouldn't dream of using such inadequate, inappropriate and inferior tapes to seal the back of Customers' picture frames. They know better and use more expenive and better quality self-adhesive tapes such as the Kikusui, Stylus or Rinrei Kraft tapes shown below. 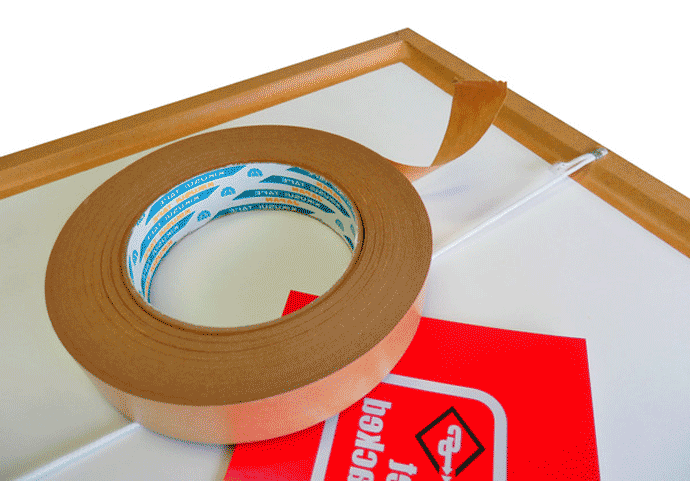
These picture framing tapes, or backing tapes, of the above brands, have several good characteristics in common.
Typically tan in colour, these sealing and backing Kraft tapes are coated with natural rubber adhesive and are well known for their high tensile strength, good shear strength , these do stick to themselves, are of varying thicknesses, proffering excellent resistance to Ultra Violet rays and common household solvents.
Several variants of these tapes have been developed and are manufactured for specific applications within the picture framing industries. Most picture framers like and use these tapes because these are pressure-sensitive, not water-activated, are thick, don't peel or easily fall off after a while, can overlap each other and really help prevent insect entry, nesting and infestations.
A lot of handymen and amateurs use cheap masking tapes to seal and close the back of picture frames. And while these tapes seem to do the job well enough when first applied, they all do come off with time, thus allowing free entry to bugs and insects, the bane an scourge of all art on paper.
While on the subject, having the correct tape isn't enough to do a job properly. Calling some tapes self-adhesive and expecting them to self-adhere by themselves is a common mistake. All self-adhsive tapes need to be burnished for full and proper adhesion, lest the tape laying result in an uneven and thus, imperfect bonding as exemplified below:
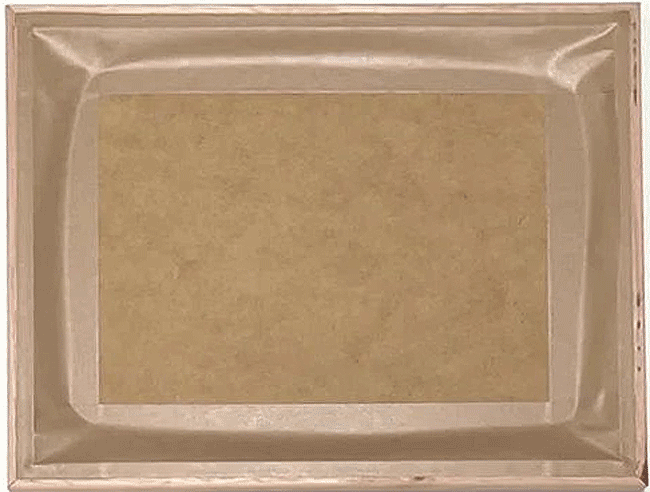
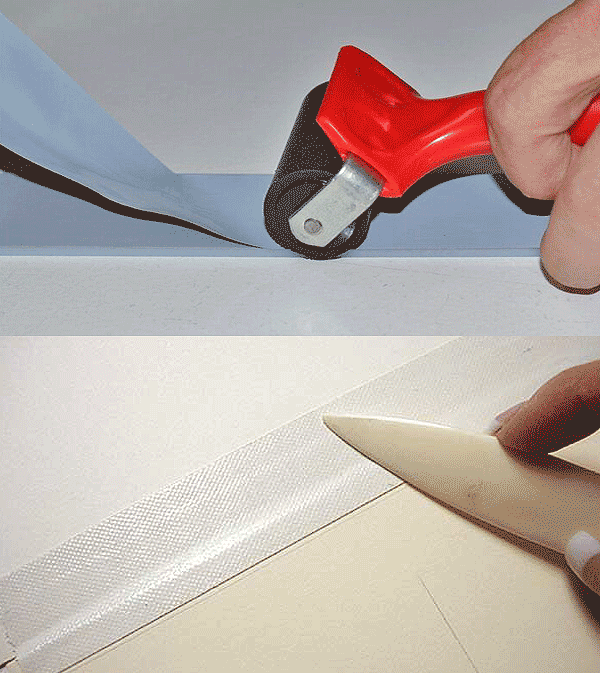
The burnishing of tapes is a very simple and easy technique, but it is often either overlooked or forgotten. Most picture framers burnish by hand, pressing down whilst laying tapes, with their thumbs and index fingers mostly, while others, photographers, artisans, conservators, etc prefer to use hand tools, dispenser or applicators:
Yet another common problem, the one we adduced to in the beginning of this post, and again caused by the use of inferior tapes, is hinging of art to window mats or backing boards with either acidic or disposable, office, or manufacturing tapes such a stationery tapes, painting tapes, masking tapes or packaging tapes.
In picture framing, hinging, or to make hinges, is the technical term for the taping of art to the the back of window mats or onto backing boards, as shown below:
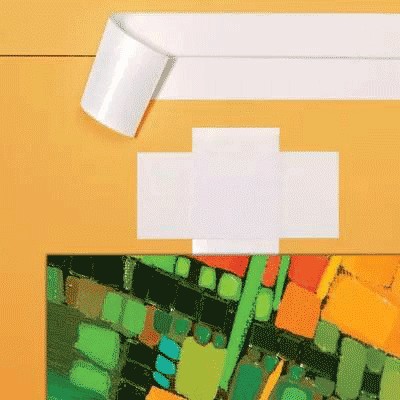
Again and as in the case of any backing tapes used in picture framing to close and seal the back of picture frames, it is essential that the tapes not degrade or lose their adhesive power, lest the artwork fall off or out of its place, as mentioned earlier and at the beginning of this post.
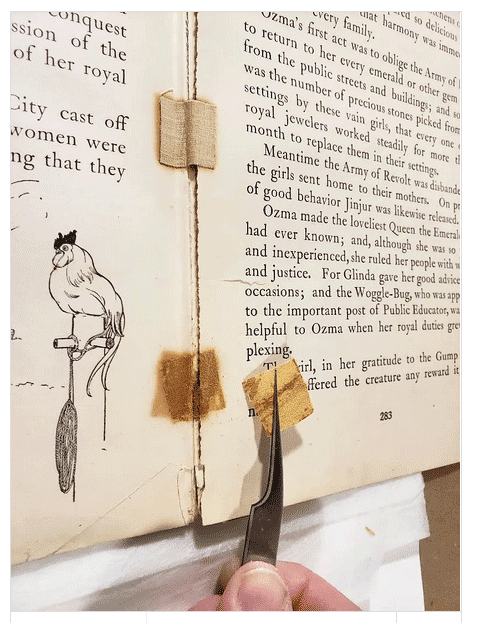
A good photographic example of a really bad tape is shown below. Instead of using a quality, professional paper mending tape, a well-meaning book owner or amateur conservator taped together loose pages of an an antique "Wizard of Oz" book edition with some dastardly, acidic, cloth tape.
It not only failed to maintain adhesion but it also badly soiled and stained the pages during its unfortunate and disastrous permanence.
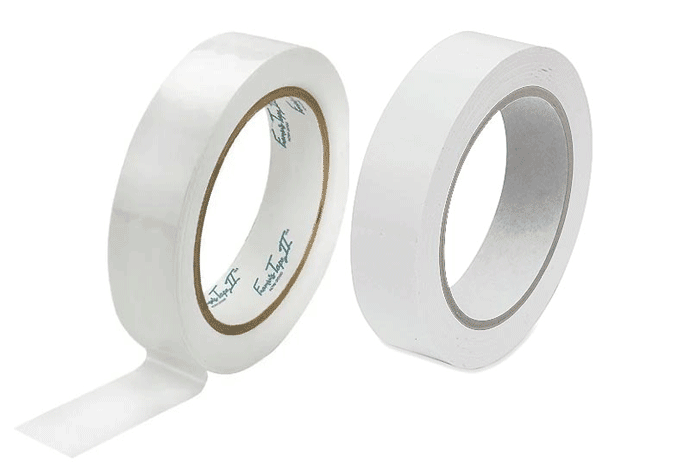
An acid-free, quality, self-adhesive, photo-safe, archival, professional picture framing tape is shown below. We use this tape for hinging and internal mount work ourselves in our own workshop. While it is not the cheapest of archival tapes, the Framer’s Tape II is absolutely acid-free, strong, pliable, durable and reliable.
We have never known it to soil or to stain art, to dry out or to fall off in the many, many years we have been using it for picture framing use and and for our picture frames, see it below:
Both from our own picture framing experience and Customers' feedback, we can state that cheap tapes should never be used for a delicate, fragile, yet permanent task, such as picture framing. Those tapes won't stay on for long, drying out, coming apart and falling off even after a relatively short period of time.
Packing, packaging, masking or even painting tapes may seem ideal for a quick fix job however these are to be avoided, even for external taping, such as sealing the rear or picture frames.
In addition, internal taping , or re-taping, is not normally a do-it-yourself job and will probably require an expensive visit to a professional picture framer. And while it may be quick and easy enough to re-seal the back of picture frames, it's a lot more complicated, delicate, time-consuming and expensive task to re-hinge and re-tape a fallen window mat or mounting board inside frames.
This particular problem usually requires a visit to a local picture framer, which is a lot more expensive that having simply having bought and used a good quality picture framing tape in the first place.
The Do's and Don’ts of Picture Framing Tapes |
|||
| List of Do's | List of Don'ts | ||
| ✓ | Do buy tapes made specific for picture framing use. | ❌ | Don't buy or use any tapes that you find around the house. |
| ✓ | Do press or burnish any and all tapes to ensure adhesion. | ❌ | Don't simply unroll and any self-adhesive tape. |
| ✓ | Do seal the back of picture frames with Kraft Paper Tapes. | ❌ | Don't seal the pack of picture frames with masking tape. |
| ✓ | Do hinge all art with archival or acid-free tape. | ❌ | Don't use stationery tape to hing any and all artwork. |


