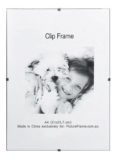
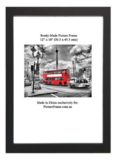
As the first question, does your painting need a picture frame at all? And no, this isn’t too strange a question to ask  –nowadays. This is because many modern oil paintings, or art on canvas, are painted or printed directly on cheap strainer frames, and hence, our post "How do I frame and hang my stretcher-framed oil painting art?" The strainer frames, a cheaper version of stretcher frames, already have an inner frame made up of strainer bars. The four .. strainer bars already form the perimeter of the frame which can be used as a support to hang the strainer frame form.
A separate picture frame is not always needed and the modern trend is to display the art in the strainer or stretcher frame. Many artists prefer this without-outer-frame technique not only because it’s cheaper but also because it allows the beholders of the art to focus entirely in the art, without visual, peripheral distractions Thus, and providing that this frame is straight and sturdy enough, you can attach the hanging device directly at the back of this frame.
To successfully accomplish this you will need to source at least 2 D-Rings, 2 wood or pan head screws , a sufficient length of wire or nylon ( Venetian blind quality ) cord and a medium size screwdriver. Start by making sure that your art ( paint or freshly printed photo) is completely dry and the resting floor or surface is clean to avoid damaging the art.
Now turn your canvas over so that the back faces you. Measure and then mark with a pencil 1/4 of the way down, from the top of the desired orientation ( portrait-vertical or landscape-horizontal ) the right and left spots where you will screw in the D-rings. Screw in each D-Ring at the marked spots at either side of the bar.
Then insert and thread the wire or cord into each D-Ring making sure that the ties or knots are secure and will not fair or slip out of their places. Some people do so leaving a little slack, some do not do this because both materials slacken a little over time anyway. Finally, hang your wired or corded strainer or stretcher frame to the wall of your choice with suitable and appropriate wall hooks.
The subject of hooks would fill an entire book and is beyond the scope of this post, however be wary of self-adhesive “magic” wall hooks. We come across frequent cases of adhesive hook hanging failure and many people prefer the old-fashioned 2-wall-hooks method to hand their art from. Now them, after hanging your art, tug it downwards just a little bit, to test your hanging.
If the frame stays hung in place you’ve done it right, if it falls off then you’ve not done it right, so re-trace your steps and remedy the failure or failures. So much for frameless strainer frames or stretcher frames. Now let’s consider the above with a proper, disparate, outer picture frame added, as it’s been done for literally, hundreds of years.
Many art collectors and lovers consider this full picture framing technique as the most appropriate one. They consider the outer frame as helping to define the scope of the art and adding value to a hand-crafted creation.
Be aware though, that a poor-quality or visually discordant outer frame, may have the opposite effect and detract from overall aesthetics of the oil painting. However, and before buying or commissioning an outer frame, you should consider protecting you art, and particularly so if it is a valhttps://pictureframe.com.au/all-frames-all-products/self-tapping-steel-crews-box-of-1000/uable or expensive painting.
A first step, and after the a painting has dried, aged or ‘cured”, is to give it a protective coat of varnish to help fend off unwanted dust dirt and grime. The appropriate varnish selection and how to apply it, are operations best performed in consultation with the original artist or art professional to avoid damaging the art itself. With the passing of time, the varnish will slowly age, darken and decay. It will need to be removed and replaced with a fresh coat.
In most cases, this is best done by an art restore or qualified art expert. A second step is to decide whether or not you want your oil painting glazed, that is with or without glass. The vast majority of oil painting go unglazed, for the simple reason that painting can take a long time to dry. If an uncured or still-wet oil painting is glazed, the paint will stick to the glass, damaging it.
The white oxides is some paints can take more than 2 years to dry and most people want their painting framed as soon as these are finished. If glazing is required, as this practised by some, leading United Sates galleries, this is best undertaken by a specialist picture framer.
He or she will firstly test and make sure that the art is fully cured, does not emit paint fumes, and secondly will do by properly spacing the glass form the art. And if glazing is to be fitted, a suitable Ultra Violet barrier, or museum glass is the best choice to protect the art from unblocked, suffused or diffused, harmful ultraviolet rays which fade colours.
Having taken care of protecting your canvas you can look at procuring an external picture frame for it. Moulding sizes, colour, finishes and styles vary considerably and the choice are nearly endless. Your local picture framer will be able to help in this respect.
Alternatively, if you want to buy a pre-made or adapt and existing frame, just make sure the size fits and that the frame blends in with your art. Trust your eyes, in most cases your instincts will be correct. If the frame doesn’t feel or look right straightaway, then chances are that’s how it is. Don’t intellectualize this instinctual, primal process.
Picture frames are like people. If they don’t like them first off, you’ll probably never like them. Having purchased your separate picture frame you can consider fitting it to the strainer or stretcher frame and then hang the assembled art. Again, you picture frame needs to be strong enough to house and support both the inner frame and hanging wire or cord.
To do this you should obtain: 2 D-rings and wood screws, sufficient wire or cord for hanging either way, half-dozen Z or L offset clips with double the amount of screws, some double-sided adhesive tape, an appropriate sheet of Kraft or Backing Paper and a medium-size screwdriver
You can then proceed in this way. Place your art inside the external frame that you have either sourced or made. Ensure that it fits inside a little loosely, not too tightly and flash against the inside rebates of the frame. It should sit nice an flat, without rocking or rolling.
If it does this then it means that there may be dirt or other foreign matter of objects on top of the rebates. These must be removed to ensure flatness and evenness throughout the length of the four picture frame’s rebates. You can now fasten the Z or L clips to both frames thus securing them together as one, solid frame assembly.
Next you lay down one or more strips of double-sided adhesive tape at the back of the frame and all four sides of the outer picture frame. Now lay over the taped surfaces the Kraft paper you sourced earlier, pressing, burnishing and smoothing the paper flat as you go.
You can trim-off any excess with a Stanley or Kraft knife. Lastly you can fix the D-Rings at the back of the frame and hang it exactly as suggested earlier in this post. Thank you for reading this post "How do I frame and hang my stretcher-framed oil painting art?"


You suggested putting a dust cover at the back of the frame. However some framers don’t like doing that as the sealed enclosure provides perfect shelter for spiders, ants, silverfish and other insects that can cause damage to paper art.
My father is not a fan of the Kraft backing paper used as dust covers. He says that silverfish love it. Yet I think I read somewhere that manufacturers put something in it to counter this. Any truth in that?
I bought several Indonesian oil paintings back to Australia last year. I had them all framed with stretcher frames and without external picture frames. This is the fashion now and anyway, it’s so much cheaper without picture frames, about half the price. My art looks cool too!