


This post on how to replace broken glass in a picture frame, was prompted by an innocent enough Customer remark on the cost of reglazing  ( replacing old glass with new glass in a picture frame, whether broken or not ) a picture frame that someone had inadvertently stepped on. The remark was to the effect "Why does it cost so much to to get new glass put in a picture frame?" Now, the picture was about 50 x 50cms and the cost quoted was $37.74 which, by the way, we believe to be a fair and reasonable. Nonetheless the Customers persisted with his query in wanting to know the exact pricing formula. We didn't disclose it but sensing that the Customer was keen on saving money, we commented that the charge was made up of de-framing, supplying the new glass and re-framing.
At this point the Customer decided to simply buy the glass, which worked out a around half the cost, and that he would do the reglazing himself, which was fine by us. However the consultation for food for thought and since we seem to be getting a couple of repair jobs a week, and seeing as more than one Customer has asked for a cheaper solution, we thought we'd write this post up on how to cheaply replace broken glass in a frame.
Perhaps a first point to discuss is whether or not the re-glazing of a picture frame is worth the Do Your Own (DYO) time, effort and expense. We say this because, taking as an example our A2 Natural Wood Poster Frame below, currently priced at a very reasonable $21.95:

Yet, we understand that most other picture framers and glaziers around our area will charge around $20 just to supply and A2 size, clear glass pane. This then begs the question whether the extra driving to and fro and personal time expended in reglazing this size picture frame ourselves is worth it? To out mind, no, it's not.
A second important aspect to discuss is how to handle a picture frame which has broken, or cracked, glass. A sample photo of framed sunset poster print with shattered clear float glass is shown below.

Aside from personal safety, the main concern is how to stop further damage to the artwork under glass. In many cases the art may be an inexpensive , open edition, production or commercial poster and easily replaced. In some other cases though, it may be an expensive piece, perhaps an original, a watercolour, an etching, a limited edition, serigraph, or a valued work of art.
It is in these cases, aforethought must be given as to how to stop the glass shard from moving, and further scratching, scraping, gouging or puncturing said art thus causing further, and yet preventable damage.
In most cases, the temporary taping over of the glass shards, or sections of glass, with warning, masking or packaging tape, somewhat as shown below, will avoid a lot of subsequent damage. Professional picture framers are usually familiar with this emergency taping application and will carefully remove all glass with great care so as minimize further damage.

Once the emergency taping has been done, the framed picture, still with the broken glass inside, can be carried somewhere flat where it can be laid down and handled for the reglazing, and repairs, if any.
The flat surface may be the picture framer's workbench or the D.YO. repair person. In either case, the frame should be carefully laid glass down and back up, with as little movement as possible, to avoid the glass hard moving and cutting or scraping the framed art.
Once the frame is laid, face down, on a table, bench or workbench, it should be opened up, the backing, art, window mat ( if any) removed and any glass shards and splinters, carefully removed by brushing them off the frame's rebates.
As shown in the illustration below of our 5"x7" Ashwoood Photo Frame with clear glass and stand, the rebates are the recesses where the glass, art, mat ( if any ) and backing are put inside the frame. All frame mouldings have rebates which can vary from 5 mm to 10mm with 8mm being quite a common width.
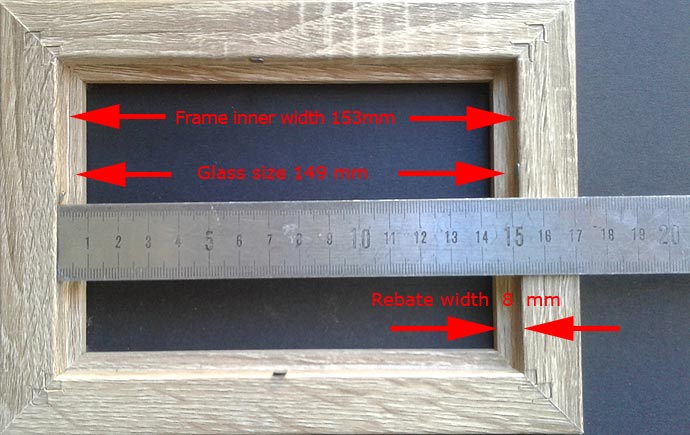
Focussing on the diagramme above, it will be seen that the actual width at the frame at the back is 153 mm. However if the glass is cut at exactly that size, chances are that it will get stuck in the opening and not sit into and inside the frame properly.
This is not desirable because uneven pressure may be placed at the back of the frame when fitting it, thus possibly leading to glass breakage. In addition, uneven glass is easily noticed at the front of the frame and it will look obviously incorrectly fitted.
To cut the new glass pane so that it fits correctly, a clearance of few millimitres needs to be allowed for. A good rule of thumb is deduct form the opening size half a rebate's width. Again referring the illustration above, this would be the opening width less half a rebate width or 153 - 4 = 139 mm.
Picture frame moulding manufacturers vary somewhat in the widths of their rebates, and each frame should be measured, but generally speaking , 8mm is the average width. Thus, whether a frame is a small A5 black wood photo certificate frame or a large, A0 raw oak wood poster frame, the rebate width will not vary that much.
Using the above tips, the size of a replacement glass pane can be easily worked out. Now let's get underway the task to replace broken glass in a picture frame the task is to source a piece of clear float glass large enough to cut down to the desired size. A glass cutter will be needed for this, one is shown in the illustration below.
These small hand tools nowadays are sold online cheaper than a large cappuccino. No home workshop or handyman should be without one, they're so useful and so cheap.
To buy a piece of glass, a good idea is to ring local picture framers or glaziers asking if the have "glass seconds" or "glass off-cuts". These will be cheaper than glass cut from stock do not involve cutting down new, large stock sheets. Most workshops or glaziers have some of these stacked against a wall somewhere.
Next comes the glass gutting though this is somewhat of a misnomer because glass is actually scored, rather than cut, using a glass cutting tool. The glass cutter is run by hand along a straight edge, with a small downward pressure. This causes the small, round, carbide cutting wheel to leave a mark, or score which is visible in the image below:

Once the section of glass has been scored, it can snapped off, or broken off, in a few ways, a couple of which are shown below:

Care must be taken when performing these tasks, of for that matter, whenever handling glass. In our workshop, as an example, whenever our picture framers handle glass, they use rubber-coated glass handling gloves and safety eye-wear to maximize safety .
The next step is to reglaze the frame which should be done carefully, to avoid cuts or gashes. The edges of the glass will be sharp, so never run your fingers or hand along these. Some glaziers use a hand carbide seaming tool to smoothen and abrade these edges which can be useful.
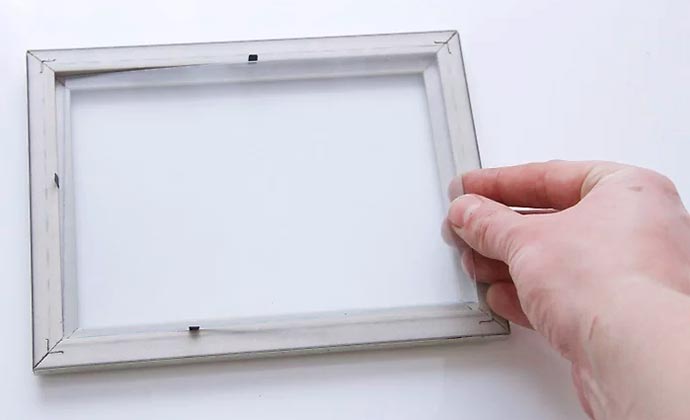
However, and generally speaking, picture framers rarely us use hand seamers because the glass is normally set recessed well inside the picture frame's rebates as soon as it's cut, see below:
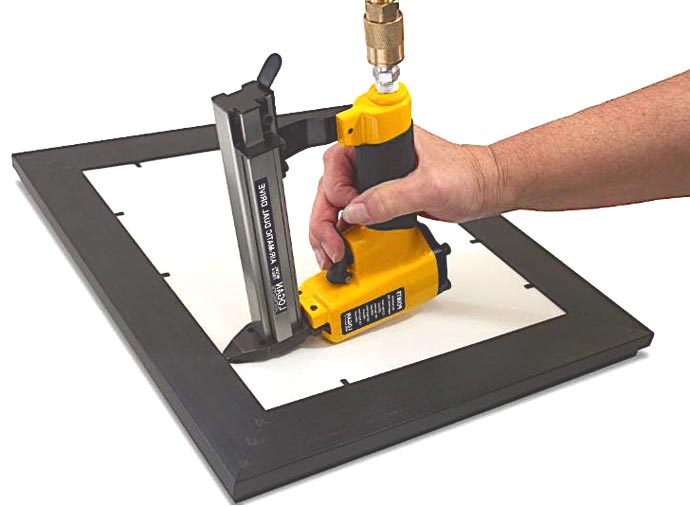
Once the reglazing is completed the frame will need to be fitted up and sealed. The photo below shows a picture framer using an air stapling gun to fire flexible tabs into the rebate. The tabs hold the complete sandwich, this being the glass, artwork and backing, securely inside the frame.
Most Australian framers actually seem to use a staple gun which fires either narrow or wide crown galvanized steel staples, which are cheaper than flexible tabs, but the result, is much the same. Firing flexible tabs can be advantageous if one wants to remove the artwork, otherwise it's much of a muchness.
Now to one of the last operations, to seal the back of the frame with picture framing tape, a shown below. While a lot of the picture frames we see coming into our workshop, for one reason or another, do not have a seal or taping of any kind, it is always good practice to seal the rear of picture frames.

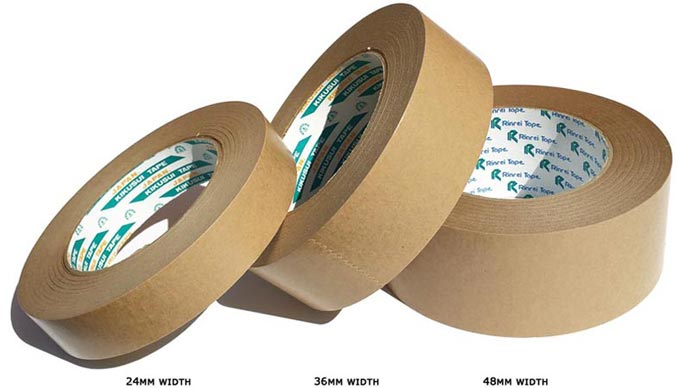
Among local picture framers, by far the most popular of the picture framing sealing tapes is the self-adhesive, flatback, Kikusui brand available in 3 widths, 24, 36 and 48mm. Taping the rear of a picture frame is easy enough, remembering a couple of points. The first is that the entire rebate should be sealed, not just one or two sides.
The second is that the tape, while self-adhesive, needs to be burnished, or pressed into position, smoothing out any trapper air bubbles. The reason for a good seal is so that insects and other pests will not enter the picture frame receptacle and soil or damage the artwork therein.
The penultimate operation is to string the frame. Most picture framers use their pneumatic staple gun to simply staple the cord into the back of the moulding using narrow crown staples but this method is satisfactory for smaller picture frames only. More to the point here though, most home users or handy-persons would not have a pneumatic system set up.
For medium and larger frames, steel D-Rings, or even heavier strap hanging hardware, is recommended. Frame hangers failures can be expensive, not only in terms of damage to the actual picture frame but also for breakages to its surroundings, furniture, aquariums, glass tables, and people even.

A very last task in how replace broken glass in a picture frame, is to fit four corner protectors, as detailed below, to the freshly re-glaze picture frame, should transportation be needed. These aren't always needed for small photo frames, but for larger and medium picture frames and photo frames it's always good practice to do so.
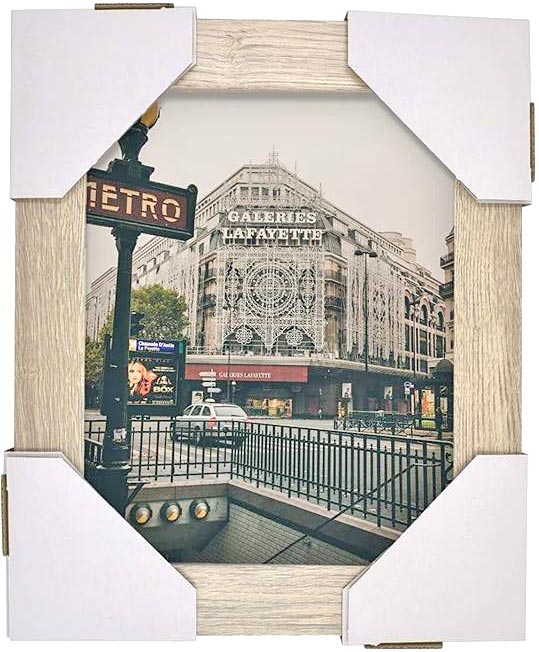
Seeveral Customers have told us that these picture frame cardboard corner protectors aren't readily sold at art stores and just in case these prove difficult to find, here they are below: Thank you for reading this post "How to cheaply replace broken glass in a picture frame", we hope you enjoyed it!
Thank you for this post. I actually had an old glass cutter inherited from my dad. I put some kerosene on it and the wheel started to run freely. I practiced on and old glass window pane before cutting glass for some photo frames I had to make good.
This is a fantastic guide on how to cheaply replace broken glass in a frame! I love the clear instructions and the tips on alternative materials like acrylic for those looking for a more budget-friendly option. The step-by-step approach, including how to carefully remove the old glass and replace it without damaging the frame, is really well explained. It’s great to see such a practical solution for minor repairs that can save money without sacrificing the quality of the frame. I’ve worked with window installations in the past, and I’m curious if the techniques you’ve outlined could be adapted for replacing glass in window frames as well, especially when dealing with older windows. Would you recommend using the same materials (like acrylic) for window glass, or would a different approach be needed to ensure durability and proper sealing? Thanks for sharing this helpful information!