It has been our experience, and in particular during these last 20 years or so of custom picture framing, that  Customers seem to be wanting to spend less and less for any kind of custom picture framing, hence this post "How to cheaply stretch and frame your own counted cross stitch" . We are finding that most people baulk at even moderate custom picture framing prices, wanting to spend as little as possible on custom picture frames, even less than what they used to, years ago. Why this is so is beyond the scope of this blog. Suffice to say that the tsunami of cheap, Asian imported photo and picture frames, selling at a fraction of Australian made picture frames, seems to have habituated many Customers into thinking that all picture framing and picture frames should be as cheap as chips and that the average picture frame shouldn’t cost much more than a cappuccino. Textiles, in particular, can be fairly expensive to frame, much more than prints or photographs, because the picture framer has to slowly, patiently and carefully mount, stretch and space the sheet, cloth, fabric or embroidery, before framing it. Cross stitch embroideries are popular in many families and while the Aida cloth and kit may be cheap enough the custom picture framing is not. If you are still reading this, chances are that you know what a counted-thread cross stitch embroidery, or simply, a cross stitch is, and that you may be interested in saving money by picture framing one yourself. Again we assume that the picture framing that you will want is basic, not needing museum standard or conservation quality framing which will not be explained here and is best undertaken by a conservator or professional picture framer. To make a start in framing your cross stitch, you will need the following components: a) a cross stitch, preferably a small one, as this is probably the first that you’ve attempted framing, b) a piece of foamboard, easily sourced from arts and craft shops. c) A small box of dressmaker’s pins, about 25mm or 1 inch. You should now measure and cut to size a piece of white, 5mm foamboard, to be the approximate, or near enough the same size, of your cross stitch and as illustrated below:

Once you have done this, you will need to pin all four sides of the cross stitch as shown above and below. Take care to start from the centre of each side and progressively insert pins towards the ends, gently pulling the fabric taut over the foamboard as you do so. Insert the pins every couple of centimetres or so to, keep the cloth’s rows even and straight. While this may look challenging, in actual fact you will discover once you get started, it will not be that difficult. The lining and straightening up of the thread rows is easily achieving by pulling or releasing the Aida cloth before pinning it in the desired position.

With this achieved, the overhanging sides be simply be folded over at the back of the cloth and pinned, tacked, basted or laced into place. Some art stores and craft shop sell acid-free, Stitchery Tapes which may be used for this purpose.

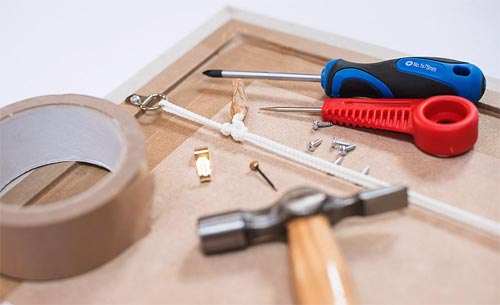
You should now have your mounted art, or the stretched embroidery, finished and ready to be framed. Now measure the art and see if its size can fit a Ready-Made-Frame size, either rectangular, or square as many of these sizes can be cheaply and quickly ordered online. If the embroidery is an odd size for which an Off-The-Shelf PhotoFrame or Ready-Made Picture Frame cannot be found, do not despair! Accurately measure the embroidery and ask you local picture frame to make you and empty-frame-with-glass frame which you take away, and fit up the embroidery yourself. Most of the cost in custom picture framing a cross stitch is in the stretching it and fitting it up into the frame. If a 40x30cms cross costs around $140 to be fully custom framed, the frame and glass only components might well work out at being around$ $60, this being a saving of up to 60%. Once you have the frame and glass all you need to do is the “fitting up” or assembling everything into a complete or finished frame. Clean the glass, then place the stretched embroidery inside the picture frame with a piece of matt board or clean, white cardboard to be used as a backing. You will then need to secure the “sandwich” comprising of the glass, the embroidery and the backing, into and inside the picture frame so that it won’t fall out. The securing can be done by hammering or driving into the sides at the back of the frame, small nails, framer’s points, glazier’s points, flexible tabs or even retaining clips. With that done it is always best to seal the back of the frame closed by taping self-adhesive Kraft tape or picture framer’s tape on all four sides at the back. This helps keep insects from entering the inside of the frame and soiling the artwork. The last operation is to screw in a couple of D-Rings at the back of the frame, then thread a venetian blind type cord between the two and tie each end, so that the framed embroidery may be hung. Again, the D-Rings and other components should be easily be obtainable a friendly, local picture framer, local hardware, or art store.

Many do-it-yourself craftspersons also like to put two felt bump-dots or bump-ons at the back of the picture frame so as to lift it a bit off the wall. This little finishing touch helps to stop the frame from marking the wall, aids in ventilating the rear of the frame and assists in keeping insect and bugs from partying all over the back of your framed cross stitch. Lastly, in this blog we purposely left out professional picture framing methods, features and components such as lacing, spacers, Ultra-Violet blocking glass and museum or conservation window mounts and materials. Once more, if and when these methods, features and components are warranted, required or desired, please consult a professional picture framer. Thank you for reading this post "How to cheaply stretch and frame your own counted cross stitch"


I found this blog on stretching cross stitched interesting and helpful. In particular, the stretching-with-pins over foam board suggestion helped me overcome the problem as to how stretch fabric over a flat surface and making it stay flat. I did know about foam core boards but never thought of using them as stretching surfaces. Before trying this new method described here I was using at first craft glue and then tapes. But both of these methods fail to keep the fabric stay taut, tight and strait. It’s now become easier and quicker to mount my needlework and to put them into picture frames.
Thanks for this article which shows me how to frame my work without it costing me an arm and a leg. My cross stitch works are multiplying and I still have custom picture framing price shock over my last job I had framed.
Thank you! Very helpful for people who can’t afford to pay for professional framing. Very kind of you.
It read simple enough. It is full of supple warnings. It is clear, well explained with good illustrations. I’m scared of trimming off the excess Aida fabric though. It’s just a 15 x 20 cm picture— perhaps I’ll take it to a local picture framer!! Thank you, it presented me with an accurate, informed choice to make. (Perhaps next time).
[…] from the truth. To begin with, a cross-stitch fabric, like most textiles, will probably require hand-stretching, to make it flat enough to eliminate all crease, kinks, folds and pucks. Then it should be […]