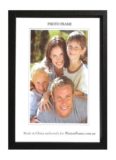
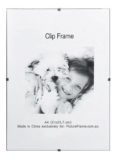
Who hasn’t some old, spare picture frame, poster frame or photo frame tucked away in the garage or spare bedroom? Hence our post "Six ways of reusing  and recycling old photo frames and picture frames". The answer is, not many of us. According to US statistics, about 82% of us do just that, keep old house hold accessories and furniture for more than 2 years. Well then, let’s explore the many, different ways we can recycle or reuse all those picture frames for or towards more good use, with minimal work.
1. Make a Chalkboard. Take the existing .. frame and make sure it’s not sprung, rickety or falling apart, then give it a clean with a damp sponge. Now measure the inside ( not the outside ) at the back of the frame and note down the measurements. Go to your local hardware store, or Bunnings, if you like, to buy the board and hardware. Get a piece of 8 or 10mm MDF or hardwood panel. Spray it with black primer paint and let it dry.
Then paint 2 coats of black chalkboard paint, with a fine Mohawk hair or fine foam roller, for a smoother finish. (For easier maintenance, cover paint tray and roller with Glad wrap or Cling wrap to stop premature paint drying) Once the chalkboard panel is dry fit inside the frame using small nails or screwing eyelets at the back to keep the board secure inside the frame. You can then staple or screw in with D-Rings a cord either way vertical or horizontal ( portrait or landscape). Once that’s done, hang up your recycled picture frame now rebirthed chalkboard and enjoy your handiwork!
2.Make a Noticeboard. Grab the old frame and check to sew that it’s not wobbly or loose, then clean it with a wet cloth or sponge. You can then measure the inside ( not the outside ) at the back of the frame and note down the measurements. After this you can visit your local timber shop or hardware store and see if they can cut you the corkboard piece form the larger sheets the probably carry. From the same supplier you should also be able to get a panel of MDF, or ply wood, at least 8mm thick, of the exact same size as the corkboard.
Again, from the same store you should also be able to buy a tin of contact adhesive. Following the contact adhesive’s manufacturer’s direction carefully, and doing so in a well ventilated, open space, coast the MDF with the adhesive. Again following directions, bond the MDF and corkboard together, the lie the sandwich down and put a weight on it, to squeeze out any unlikely trapped air. The day after, check the sandwich is should be well dry and ready to be fitted into your picture frame or poster frame. You can then fit D-Rings and a string either vertical or horizontal ( portrait or landscape). Once finished, hang up your recycled picture frame now rebirthed noticeboard and enjoy your handiwork!
3.Make a Headboard. Again, let’s retrieve and re-inspect the discarded frames you’ve found somewhere. Check it well and see that it’s not loose or wonky, else it won’t be much good for anything else. Find a tape and measure the back ( not front ) of the frame from the inside of each frame rebate. Head down your neighbourhood timber shop or local second-hand shop. Get cut or source some hard panel, plywood or plastic even, to the size of the inside of the frame that you measured before.
Now wrap around panel, any soft furnishing or fabric with an ½ foam backing to it, if possible. If you’re lucky enough to know or have an upholsterer in the family, get help from him, or her, as to how neatly upholster your headboard panel. Once satisfied with your handiwork fit it to the back of the frame by securing it small nails, or screwing turnbuttons in and at the back of the frame. Now string the back of the frame with some cord, or braided wire even. Do so securely so as not to let the headboard fall down.
4. Make a breakfast tray. Repeat the inspection and measuring steps outlined in the previous recycling projects. As a breakfast tray Is not likely to be much longer than 50cms, instead of having to buy a plywood panel, you might be able to get away with a sturdy, double-wall cardboard, a 10mm off-cut of foamboard or even a piece of left-over sheet metal. You can now spray-paint or paint the tray bottom with a foam roller, for a better finish.
The paint can be enamel or acrylic ,both are washable. However while the former is more durable, it is harder for roller cleaning, as you’ll need mineral turpentine. The latter is not as long-lasting but easier when roller cleaning as you’ll only need water. Pinterest has interesting photos of all sorts of these trays painted in bright colours and bold patterns, perhaps to match ambient décor. After the paint is dry, you can assemble it to the frame as suggested in the last 3 or so steps of the prior exercises.
5. Make a Wall or Desk Calendar. For this project you’ll want to firstly to sort out whether you have a small frame, perhaps an 11”x14” photo frame with a stand that you can place on a desk, or a larger one, even 16”x20” that you could put up as a wall calendar. Either way, you ought to again perform the inspection and measuring steps outlined in the previous recycling projects. After this, you can become artistic and free the artist within you. Get a suitable piece of art paper, white or coloured paper and section in 5 rows of 7 columns each to make 35 squares, sufficient to fit all the days of every month, for each and all of the twelve months, with spare blanks to pen in your notes, reminders and the like.
For ideas or inspirations, search ‘calendar-making’ at Pinterest or similar sites. Once you’ve done your art, it’s time to frame it! And since you will insert your 12 month sheets into the frame, you’ll need a backing to hold them inside the frae and stop them from falling out. This backing needn’t be expensive. A matboard offcut, a piece or thick cardboard even, cut to fit the frame, will do fine. If you started off this project wanting to make a smallish desk calendar then you will require a stand or easelback at the back your picture-frame-calendar to make it stand.
You can of course make one, out of crocodile board or plywood with a hinge, but it will be quicker if you visit your local picture framer or art store for one. Chances are they will have something suitable for a couple of dollars or so, which you can then use as intended. If you instead chose to make a larger, wall calendar, then revisit the last 3 or more operations described in the exercises.
6. Make a Keys Rack. This project is quite likely to be very useful. Who hasn’t searched for his or her keys in the morning after returning home tired and late the evening before? We would say, most of us, at one time or another. Therefore a handy keys rack, hanging in the kitchen, hallway or corridor, while we’re on our way out, will be a good, practical addition to starting our day. Now then, repeat the checking and measuring precautions detailed in the previous recycling projects.
Again, head down to your neighbourhood timber store and get some plank or plywood leftover big enough to fit inside the frame you’ve selected. While you’re at it, also buy a few elf-adhesive or screw-in hanging hooks because you will be hanging your keys from them. If this is too hard, a thick piece of cardboard will probably do just fine. Now fit the timber, plywood or cardboard inside the frame. Lastly, do the last 3 or more operations described in the prior projects.
With all that and said, if you don't have a used or unused photo frame or picture frame and would simply prefer to buy an inexpensive one, then you can browse online for ready-made poster frames. Thank for reading this post "Six ways of reusing and recycling old photo frames and picture frames" and again, " Six ways of reusing and recycling old photo frames and picture frames".


These suggestions are not bad but there are even more ways to re-purpose old picture frames, or photo frames, for that matter. With suitable backings, you can make letter holders, jewellery holders, self-contained shelves jewellery boxes lids, and what have you.
I actually made a jewellery box, or trinket box, with an old gilded photo frame that I had laying around. I covered the inside of the frame with red velvet, bought one of those pre-made MDF boxes at a craft store, lined that with velvet too and my husband fitted 2 hinges to the box. We love woodworking, crafts and making things.
[…] are occasionally asked if we can fit Customer's new photos framed into some old picture frames they may have. The answer is yes, but this is conditional to the quality, soundness and […]